Managing Groups
Watch video.
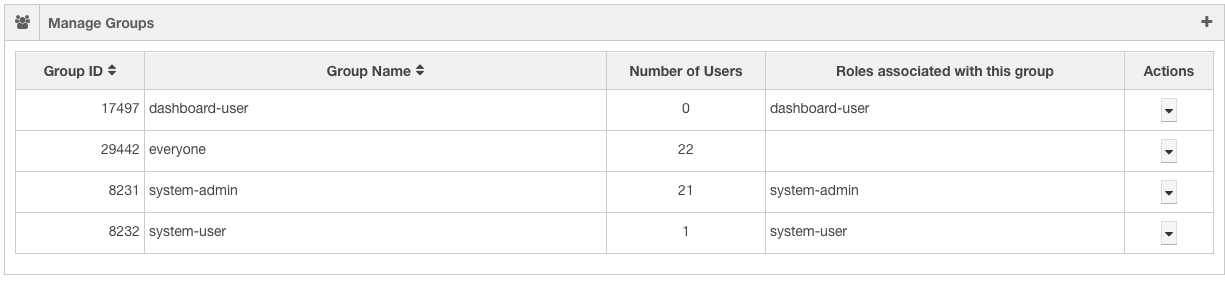
QDS creates the following groups by default for every account: system-admin, system-user, dashboard-user, and everyone. These groups have roles associated with them, which provide access control to all the users of that group.
The following table lists the groups, their associated roles, and the operations that can be performed on these groups.
| Group | Role Associated with the Group | Users | User Actions | Actions on the Group |
|---|---|---|---|---|
| system-admin | system-admin | Any user who creates the account is added to the system-admin group by default. | This group user can perform the following actions:
|
|
| system-user | system-user | Any user who is invited to join the account through QDS UI is automatically added to the system-user group if the group is not specified when inviting the user. | This group user has a restricted set of actions based on the assigned roles. |
|
| everyone | none by default. | All the users of an account are added to the everyone group by default. | This group user has a restricted set of actions based on the assigned roles. User with the appropriate privileges can add, modify, or delete any role associated with this group. |
|
| dashboard-user | dashboard-user | Any user who is invited to join the account with this group through QDS UI. | This group user has a restricted set of actions based on the assigned roles. |
|
In the Control Panel page, click Manage Groups to create and modify user groups. The Manage Groups page is displayed as shown in the following figure.
Click the downward arrow in the Action column to modify or see users in a group. Click Modify and the Manage Group Members and Group Roles page is displayed as shown in the following figure.
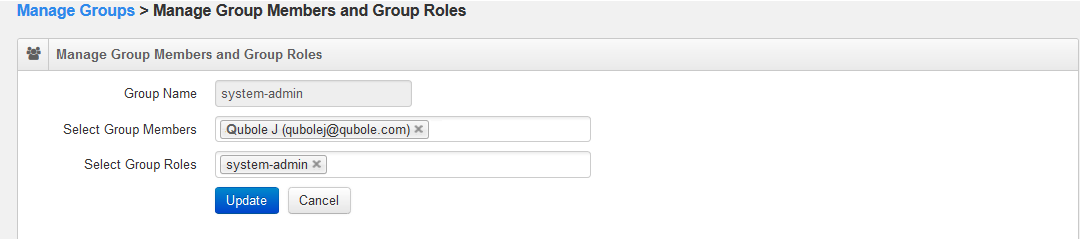
Add/remove users in the Select Group Members field and add/remove roles in the Select Group Roles field. Click Update after making the changes.
Add a group by clicking the add icon  . The Create a New Group page is displayed as shown in the following
figure.
. The Create a New Group page is displayed as shown in the following
figure.
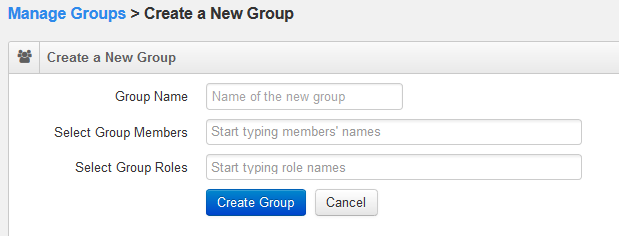
Enter a name in the Group Name text field. Add users from the Select Group Members and roles in the Select Group Roles fields. Click Create Group. Click Cancel to not save the group.
Cloning a Group
In the Action column of a specific group, click the downward arrow and select Clone for cloning that group. The Create a New Group page is displayed with the group name prefixed with clone - and the group members and group roles of the parent group.