Managing Access Permissions and Roles
QDS allows system administrators to create custom roles to control access to specific resources. A role has a list of policies that determine which QDS capabilities a user has access to. See Manage Roles for more information.
To add, modify, and delete roles, choose Manage Roles from the Control Panel.
Create a Role
Creating a Role explains the steps to add a new role.
Adding a Policy to a Role
Perform the following steps to set a policy with access and resource permissions for a role. You must have system administrator (system-admin) privileges.
Navigate to Manage Roles on the Control Panel page. Click the + button to create a new role. Select the Modify action from the drop-down list in the Action column of an existing role that you want to edit.
Creating a Role explains how to add a new role. Modifying a Role explains how to modify the access permissions of a role. You can modify the policies of an existing role or set a new policy for a new role.
Set the following policy elements:
Access: Denotes the type of access. Select Allow or Deny.
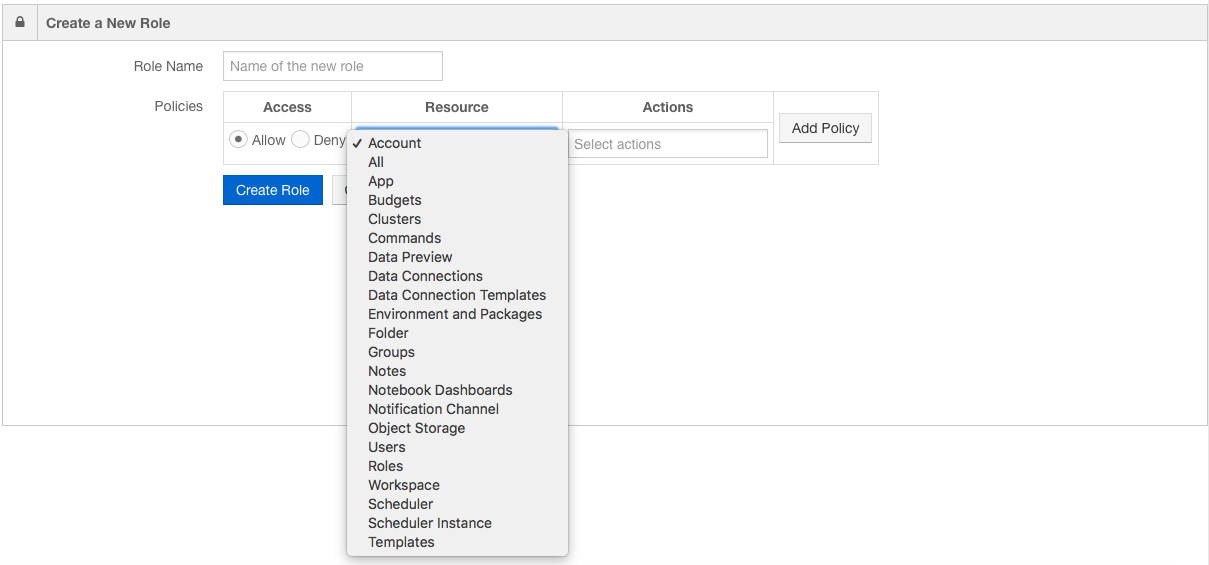
Resources: You can select All from the drop-down list, or any specific resource such as Clusters or App. By default, the drop-down list shows the Account resource. The following figure shows the available resources for which you can add access policies for a role.

Depending on the resources, you can set policy actions in the Action text field. Click in the text field to see available actions for that resource, such as create and update. Select the action that you want to set for the role.
Click Add Policy to add the policy for the role.
Deleting a Role
You can delete only custom roles; system-defined roles cannot be deleted. See role-types for more information.
To remove a custom role, click the down-arrow in the Action column on the Manage Roles page, and select Delete.