GitLab Version Control
To configure the version control using GitLab, you must perform the following tasks:
- Configuring Version Control Settings
- Generating a GitLab Token in the GitLab Profile
- Configuring a GitLab Token
Configuring Version Control Settings
You must have Account Update privileges to perform this task.
Configuration
Follow the instructions below to configure Version Control System:
- Navigate to Home >> Control Panel >> Account Settings.
- On the Account Settings page, scroll down to the Version Control Settings section.
- From the Version Control Provider drop-down list, select GitLab.
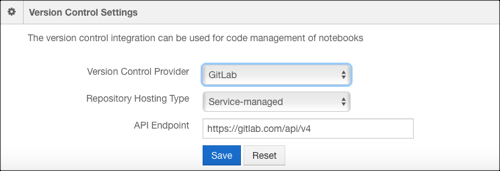
- From the Repository Hosting Type drop-down list, select Service-managed.
- For Service-managed, the API Endpoint is auto-populated.
- Click Save.
The following figure shows a sample Version Control Settings section.
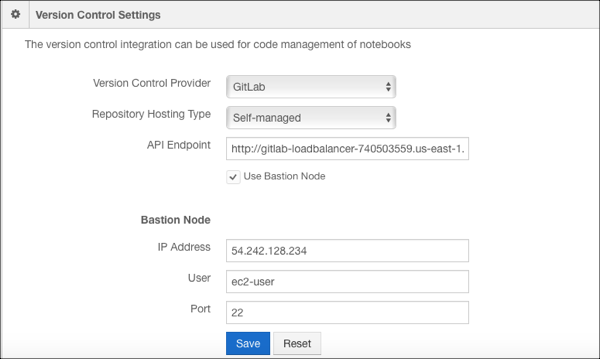
The following figure shows a sample Version Control Settings section with the Self-managed and Bastion node options.
Generating a GitLab Token in the GitLab Profile
As a prerequisite, you must obtain a GitLab token. Perform the following steps:
- Create a GitLab token by following the GitLab Documentation.
- Copy the generated GitLab token to configure it in the Qubole account.
Configuring a GitLab Token
You can configure a GitLab Token from the My Accounts UI.
- Navigate to Control Panel >> My Accounts.
- For your account, under GitLab Token column, click Configure.
- Add the generated GitLab token and click Save.
The GitHub token is configured at per user and per account setting level.