Using the Default Package Management UI
You can use the Environments page in the Control Panel of the QDS UI to manage Python and R packages in Spark applications; and in addition, QDS automatically attaches an environment with Python version 3.7 to an Airflow 1.8.2 cluster.
Note
Package management with Python 3.5 or 3.7 is supported on Airflow clusters.
The following table lists the supported Python and R versions in the existing and new package management.
| Users | Package Management | Supported Python Versions | Supported R Versions |
|---|---|---|---|
| Existing users | Existing package management | 2.7 and 3.5 | 3.3 |
| Existing users | New package management | 2.7 and 3.7 | 3.5 |
| New users | New package management | 2.7 and 3.7 | 3.5 |
Use the Environments tab for:
- Creating an Environment
- Attaching a Cluster to an Environment
- Adding a Python or R Package
- Editing an Environment
- Cloning an Environment
- Managing Permissions of an Environment
- Deleting an Environment
Creating an Environment
Navigate to the Environments page in the Control Panel and choose New to create a new environment. The following dialog appears:
To create an environment, perform these steps:
- Name the environment.
- Provide a description for the environment.
- Select the Python Version and R Version from the drop-down menus in the dialog that pops up. See QDS Components: Supported Versions and Cloud Platforms for more information about versions.
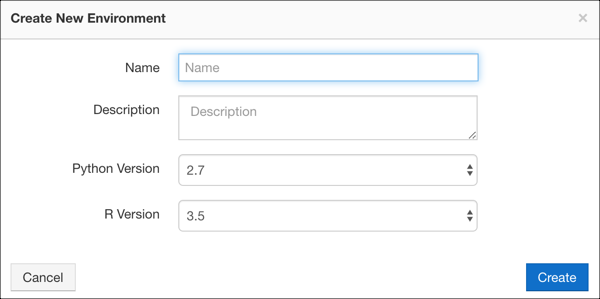
- Click Create. A new environment is created and displayed:
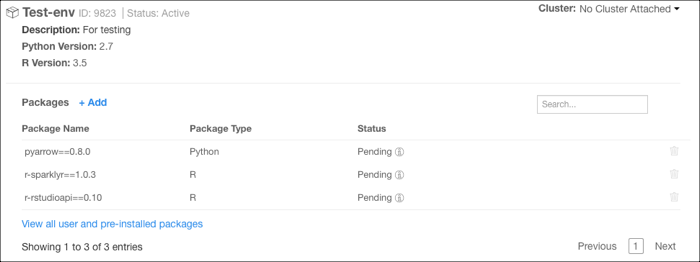
A newly created environment by default contains the Anaconda distribution of R and Python packages and a list of pre-installed Python and R packages. Click See list of pre-installed packages. See also Viewing the List of Pre-installed Python and R Packages.
You can also edit or clone an environment, as described under Editing an Environment and Cloning an Environment.
Attaching a Cluster to an Environment
Click Edit against Cluster Attached to attach an environment to a cluster. After you click Edit, you can see a drop-down list of available Spark clusters or Airflow clusters, for example:
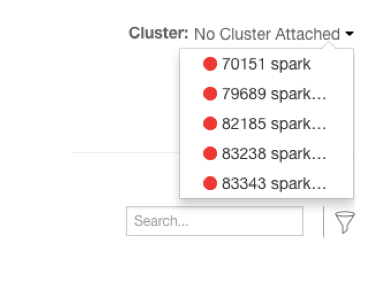
You can attach an environment only to a cluster that is down. You can attach only one cluster to an environment.
Select the cluster that you want to attach to the environment and click Attach Cluster.
You can attach environments to Spark clusters. A Conda virtual environment gets created for Python and R environments.
In the Spark cluster, Python and R Conda environments are located in /usr/lib/envs/ (existing package management) or
in /usr/lib/environs/ (new package management). The spark.pyspark.python configuration in /usr/lib/spark/conf/spark-defaults.conf
points to the Python version installed in the Conda virtual environment for a Spark cluster.
In a Spark notebook associated with a cluster attached to the package management environment, configure these in its interpreter settings to point to the virtual environment:
- Set
zeppelin.R.cmdtocluster_env_default_r - Set
zeppelin.pyspark.pythontocluster_env_default_py
You can also attach an environment with Python 3.7 to a cluster running Airflow 1.8.2; any previous environment must be detached from the cluster first. For more information, see Configuring an Airflow Cluster.
To detach a cluster from an environment, click the Delete icon next to the cluster ID. The cluster must be down. If you detach a Python 3.7 environment from an Airflow 1.8.2 cluster, you must attach another Python 3.7 environment or the cluster will not start.
Adding a Python or R Package
A newly created environment contains the Anaconda distribution of R and Python packages by default. An environment also supports the conda-forge channel which supports more packages. Questions about Package Management provides answers to questions related to adding packages.
Note
You can install Python packages either from Conda or PyPI from the Python Package Repo drop-down list for faster installation of packages. This feature is available by default for users of the new accounts. Users of the older accounts should contact Qubole Support to enable this feature. If you have restrictive egress rules on your cluster, you must allow the following repositories to use the full package management:
- By default:
https://repo.continuum.io/,https://conda.anaconda.org/,https://pypi.org/ - For CRAN packages:
https://cran.r-project.org/,http://cran.cnr.berkeley.edu/(or allow redirection fromhttp://cran.us.r-project.org) ,http://cran.us.r-project.org/
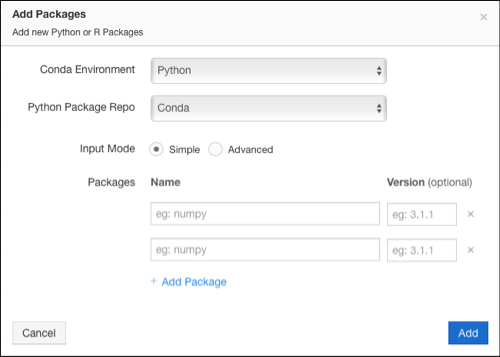
To add Python or R packages, click Add against Packages in a specific environment. The Add Packages dialog appears as shown here for the new accounts.
The Add Packages dialog appears as shown here for the old accounts.
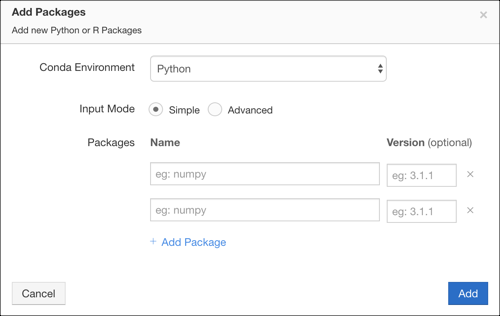
Perform these steps:
For new accounts, Conda Environment shows Python and Python Package Repo shows Conda by default. You can change Python Package Repo to PyPI based on packages to be installed. Select the appropriate packages.
For old accounts, by default, Conda Environment shows Python. You can choose R Packages as the source from the list to install an R package.
Adding source supports two input modes: Simple and Advanced. The Simple mode is the default input mode and add the name of the package in the Name field.
As you try to type the name, an autocomplete list appears and the package name can be added and the version is optional and it can be incremental as shown here.
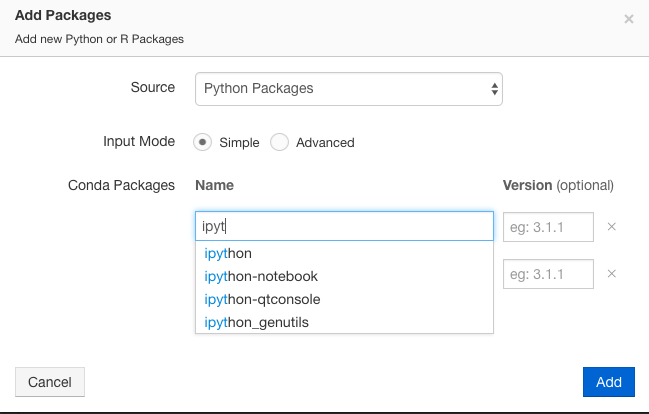
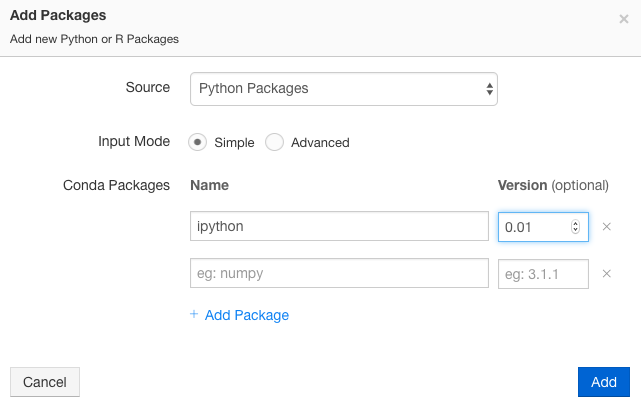
If you just mention the package name, then the latest version of the package is installed.
Note
If you upgrade or downgrade a Python package, the changed version is reflected only after you restart the Spark interpreter. Interpreter Operations lists the restart and other Spark interpreter operations.
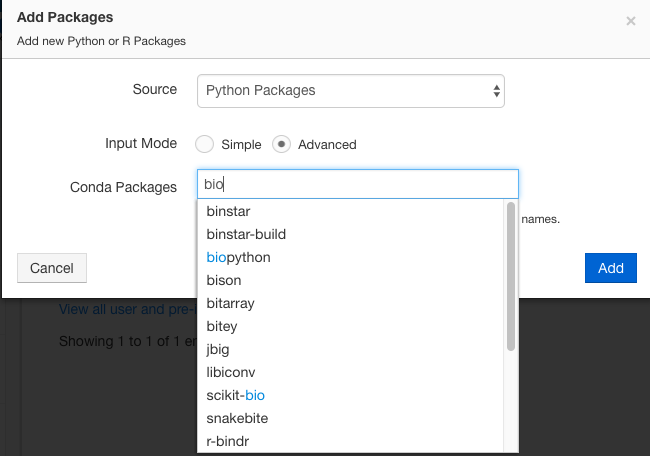
If you choose the Advanced mode, it shows suggestions and as you start typing the package name, you can see the autocomplete list as shown here.
In the Advanced mode, you can add multiple names of packages as a comma-separated list. You can also mention a specific version of the package, for example,
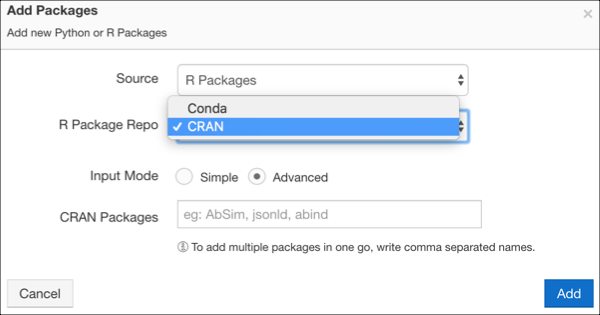
numpy==1.1. For downgrading, you can just mention the version number to which you want to downgrade. If you just mention the package name, then the latest version of the package is installed.Qubole supports adding a R Package from the CRAN package repo. This feature enhancement is not available by default. Create a ticket with Qubole Support to enable this feature on a QDS account. Qubole allows you to add an R package from the CRAN package repo only in the Advanced Mode. To add a R package from the CRAN package repo, follow these steps:
- Click Add Package.
- Select R Packages as the Source.
- In the CRAN package, you can enter a comma-separated R package names. You can also simultaneously install packages from the Conda Packages. The Conda Packages as well as CRAN Packages text fields accept a comma-separated list of packages.
Here is an example of the UI dialog to add R Packages in the Advanced Mode.
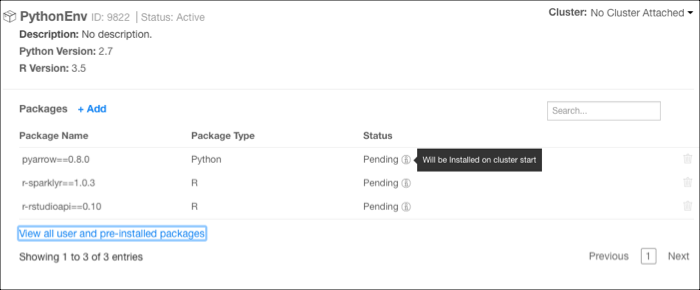
After adding Python or R package, click Add. The status of the package is shown as Pending. You must start the cluster for the installation to complete. After the installation is complete, the status is shown as Installed.
The following figure shows a sample package with packages in Pending state.
Note
After you install the packages, you cannot remove the package from your environment. However, you can delete the failed packages by clicking on the corresponding Delete icon.
Editing an Environment
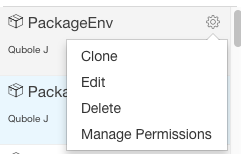
You can edit an existing environment. In the left-navigation bar, you can see a Gear (settings icon) if you do a mouse hover on a specific environment. Click the icon and you can see these options.
Click Edit and you can see the dialog as shown here.
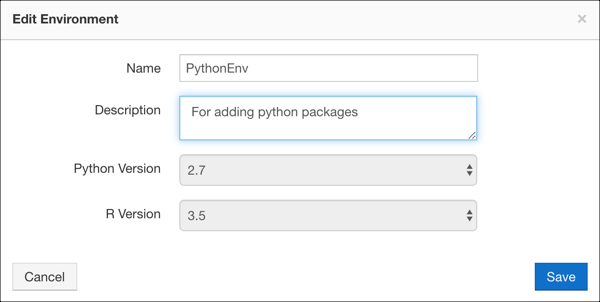
You can edit the name and description of an environment. After changing the name and/or description, click Edit. You can click Cancel if you do not want to edit the environment.
Cloning an Environment
When you want to use the same environment on a different cluster, clone it and attach it to that cluster. (An environment can be attached to only one cluster). In the left-navigation bar, you can see a Gear (settings icon) if you do a mouse hover on a specific environment. Click the icon and you can see these options.
Click Clone and you can see the dialog as shown here.
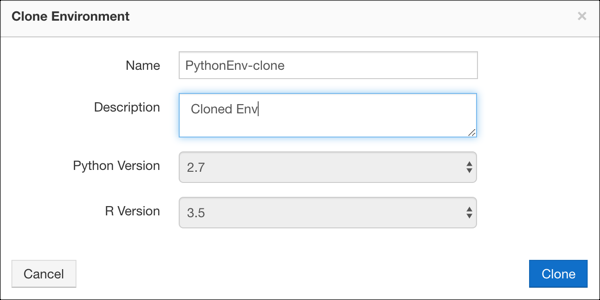
By default, a suffix to the name that is <environment name>-clone is added in the Name field. You can retain
that name or change it. You can also change the description. You cannot change application versions. After doing the
changes, click Clone. You can click Cancel if you do not want to clone the environment.
Managing Permissions of an Environment
Here, you can set permission for an environment. By default, all users in a Qubole account have read access on the environment
but you can change the access. You can override the environment access that is granted at the account-level in the
Control Panel. If you are part of the system-admin group or any group which have full access on the
Environments and Packages resource, then you can manage permissions. For more information, see Managing Roles.
A system-admin and the owner can manage the permissions of a environment by default. Perform the following steps to manage a environment’s permissions:
Click the gear box icon next to the environment and click Manage Permissions from the list of options (that are as displayed here).
The dialog to manage permissions for a specific environment is displayed as shown in the following figure.
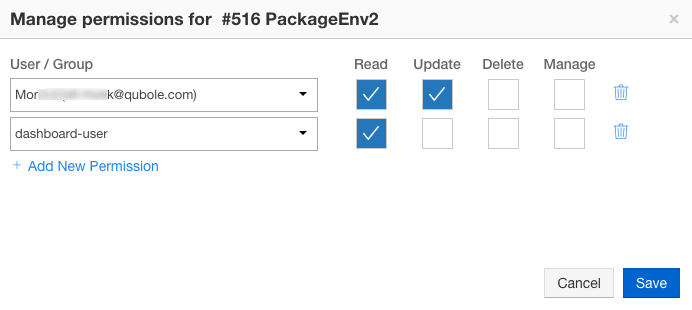
You can set the following environment-level permissions for a user or a group:
- Read: Set it if you want to change a user/group’s read access to this specific environment.
- Update: Set it if you want a user/group to have write privileges for this specific environment.
- Delete: Set it if you want a user/group who can delete this specific environment.
- Manage: Set it if you want a user/group to grant and manage access to other users/groups for accessing this specific environment.
You can add any number of permissions to the environment by clicking Add Permission.
You can click the delete icon against a permission to delete it.
Click Save for setting permissions to the user/group. Click Cancel to go back to the previous tab.
Deleting an Environment
You can delete an environment. In the left-navigation bar, you can see a Gear (settings icon) if you do a mouse hover on a specific environment. Click the icon and you can see these options.
Click Delete to remove the environment.
Migrating Existing Interpreters to use the Package Management
Even after attaching a Spark cluster to an environment, existing Spark interpreters in the notebook keep using the system/virtualenv Python and system R. To use the environment, change Python and R interpreter property values in the existing interpreter to use Anaconda-specific Python and R. Change these interpreter property values:
- Set
zeppelin.R.cmdtocluster_env_default_r. - Set
zeppelin.pyspark.pythontocluster_env_default_py.
The interpreter automatically restarts after its properties change.
However, a new Spark (not a cloned cluster) cluster, which is attached to an environment contains the default Spark
Interpreter set to Anaconda-specific Python and R that is cluster_env_default_py and cluster_env_default_r.
Similarly, a new interpreter on an existing cluster uses the Anaconda-specific Python and R.
Note
After a cluster is detached from an environment, the Spark interpreter (existing or new) falls back to system/virtualenv Python and system R.