Adding a Secure Connection to an External Data Store
Qubole allows you to support user-specific, secure connections to external data stores such as Redshift and Snowflake. You can share your connections as a template with other users and groups. This feature is disabled by default and can be enabled via Qubole Support .
Add a New Secure Connection
To add a secure connection to an external data store, navigate to the Explore page and follow the instructions:
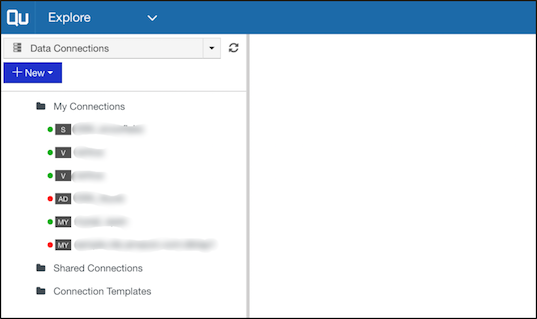
Pull down the drop-down list that defaults to Qubole Hive and choose Data Connections. Your existing data connections appear under My Connections and connections shared by other users appear under Shared Connections.

Click +New tab and the following screen appears.

Select New Data Connection or New Connection Template.
- New Data Connection: Use this option to create a data connection and keep it private (default) or share it with other users who can directly use it without providing their own username/password.
- New Connection Template: Use this option to create a data connection and share it as a template with other users and groups within the same Qubole account. Other users will then see your connection but without the username/password. They can then use their own username/password to create a connection for themselves from this template.
Change Permissions for an Existing Connection
To change the permissions of an existing connection, follow the instructions:
Click the gear icon against the respective connection.

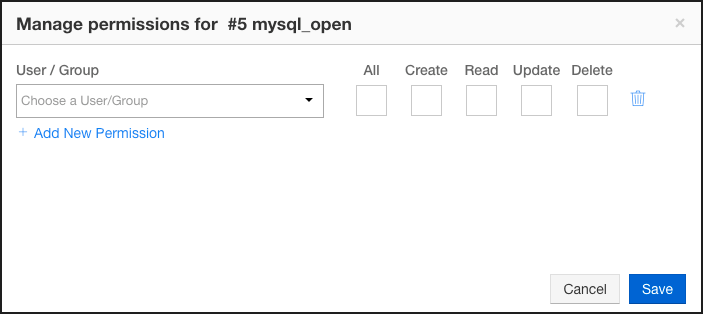
Select Manage Preferences. The Manage permissions window appears.

Select the user/group and the respective check boxes to provide necessary permissions(All, Create, Read, Update, and Delete).
Note
You can click +Add New Permission to provide permissions to multiple groups. You can also delete an entry by clicking the delete icon against the respective entry.
Click Save. You have successfully provided or managed permissions.